|
After
having a
great time riding the MX6 (the only running Greeves at the time), my
brother,
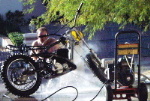
Trevor (shown riding), wanted to fix up one one of the "basket cases"
so
that we could ride together. He had the choice between this
250 Challenger or the 380 Griffon. Both
bikes
were in terrible cosmetic and questionable mechanical condition, but
the
Challenger appeared to be a little more complete and he decided on
it.
He chose wisely! :-) As the picture shows, the 35 year old
Challenger cleaned up pretty well and is now running great! Here
Trevor is giving the Challenge its first test ride after restoration. |

|
The
first restoration
step was for Trevor to power wash 35 years of accumulated grime off the
bike. Two spray paint layers (red and black) had been painted
over
the original moorland blue and all three colors could be seen at
various
places under the 1/4" layer of grease, dirt, and grime - very ugly. |

|
Once
cleaned, we removed the engine, disassembled it, and placed it in the
parts
washer to soak. Initial inspection was somewhat encouraging - no
obvious major mechanical problems; however, the crank was discolored
where
the roller bearings had rested - possible indication of the infamous
Greeves
pitted crank problem. Since the discolored areas did not "catch a
nail", we decided to reassemble it with new rollers in the
bearings
and try it as is. |

|
While
the engine
components were soaking, we cleaned up all the fasteners and plated
parts
using a wire wheel. Everything cleaned up surprisingly well with
very few damaged parts or even worn plating. It seems that the
heavy
grime had acted as a protective layer and kept everything from
oxidizing,
much like the military uses cosmoline to protect their equipment during
storage. |

|
After
exposing the 3 paint layers, we decided to chemically strip the frame
to
bare metal. The exposed braze welding was very interesting - well
done and much better quality than expected. We had to repair a
small
seam separation in the right rear "grab rail" area. A previous
owner
had "repaired" the separation by inserting a piece of all thread and
crudely
welding the seam. We used a wire feed welder to weld the seam and
fill the exposed all thread. With a little grinding everything
was
nice and flush. Good as new! The painting process also
exposed
a few small cracks in the rear engine mounting holes which we also
repaired. |

|
Here
the frame
components have been primed with PPG epoxy primer and hang in the
garage
to dry. The epoxy primer, applied with a HVLP spray gun, was very
user friendly, filling the brazing well and leaving a nice smooth
finish.
The Greeves sign in the background is an original Greeves sign which
hung
in the County Cycles shop. |

|
At this
point, the frame components have been painted with PPG aircraft quality
paint and reassembled. The PPG paint was custom color matched to
an old can of moorland blue supplied by Boyd. Note: the color
formula
is on record with my paint supplier, contact me if you would like to
purchase
some. The little guy checking out the paint job is my nephew,
Drake.
He already loves to wrench on motorcycles and helped us every chance he
got. Another gear head in the family! |

|
Drake
is checking
out the handle bar position and control lay out. Obviously
everything
is to his satisfaction. :-) "Vrummm VruMMMMMM" |

|
Ready
to fire up
for the first time in 20+ years. We had a frustrating couple of
days
tracking down an electrical problem, which turned out to be a bad set
of
points. After that it started first kick! On the 3rd or 4th
test run I found out the carb had a stripped float bowl screw, causing
the bike to uncontrollably over rev. Fortunately, I got it shut
down
(with some skin loss) and the bike is now running great! Note: it
now has a non issue kill switch installed. The kill switch was a
cheap and easy fix ($10.00 / 5 minutes) which I highly recommend. |


